
Rest easy my friends. Raiding is hard again - hard, shiny, and fun as hell. Over the course of three expansions, we have all learned at least a few tricks, and those basic skills will stand you in good stead in this new tier. Bastion in particular is a really great instance. I can't get over how gorgeous it is inside, which is refreshing after spending a year in the skull-laden Icecrown Citadel. We get it, you like bones. Get a new decorator, Arthas.
Bastion's four bosses all have unique mechanics, and you won't spend more than a few seconds here standing still and pew-pewing. Get ready to use every spell in your book, don't be afraid to think outside the box.
This guide is going to cover special shortcuts and tips for warlocks. I'm going to assume that anyone reading this guide is familiar with the mechanics of each fight, and this is merely going to outline some of the ways that us warlocks can be most effective at doing damage and supporting our raid.
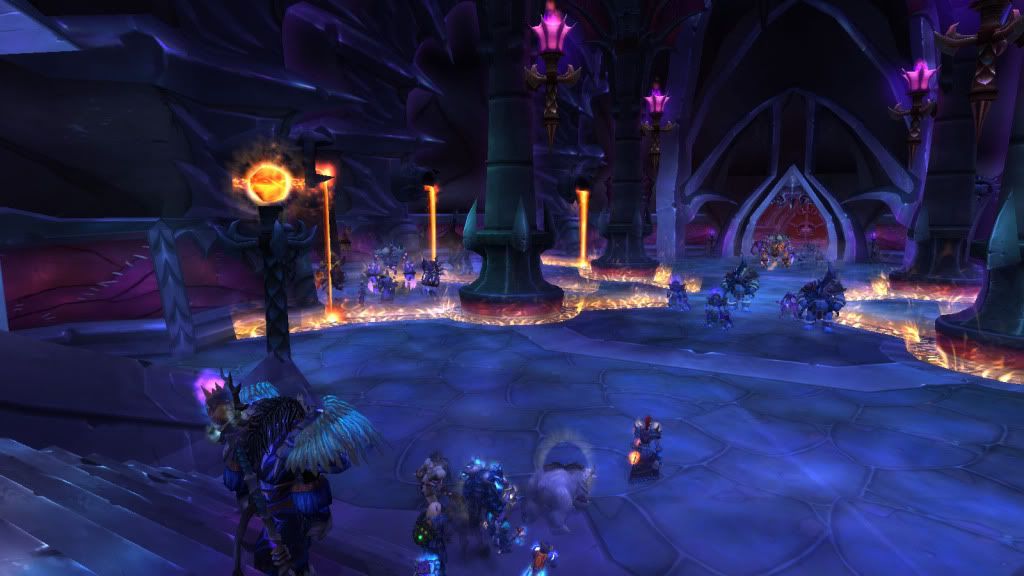
Halfus Wyrmbreaker
The multi-target nature of this fight is a real opportunity for warlocks to shine. No matter what spec you play, you can help your raid out enormously.
General:
- DoT Halfus. While killing the mind controlled drakes will be your priority, spending a few seconds putting your damage-over-time spells on Halfus will pay off in the long run. Halfus takes 100% more damage for every dragon you kill, so you are getting a lot of bang for your buck.
- Make sure you put Curse of Elements on everything. Even if someone else in your raid usually covers this buff (Boomkins, Rogues, Death Knights) it is worth your time to cover any gaps, especially if you play Destruction.
- Use your Demonic Teleport to avoid Fireballs once the Time Warden is released. You'll be pretty spread out throughout the fight, and your portal can help you jump around the room when you need to as well.
Affliction really gets lucky on this fight; between keeping full DoTs on two major targets and Halfus's debuff, the numbers are skewed in Affliction's favor. Perhaps the only weakness for the spec on this fight is the slightly clunky execute phase, when the Furious Roar makes it more difficult to keep up Shadow Embrace and Drain Soul.
- Spec into Jinx and Soulburn: Seed of Corruption. This will be invaluable on the Whelps. You will likely only have the time to Souburn: SoC once, but it will definitely be worth it. Jinx will also aid the other casters in your group to get the whelps down quickly.
- Glyph for Soul Swap. Start the fight by DoTting up Halfus, and then as soon as the first drake comes out, Soul Swap your DoTs onto him. Every time Soul Swap is off cooldown, Exhale onto Halfus, and throw a Shadow Bolt to keep as many stacks of Shadow Embrace on him as you can. The drake is your primary target, but you will be doing more and more damage to Halfus as the fight goes on -- up to 300%. This is absolutely a good investment of your time, since it costs you so little.
- Refresh all of your DoTs before every Furious Roar. This ability is going to put you out of commission for six or seven seconds, and you want to do your best to make sure your DoTs keep rolling while you aren't able to cast. Don't neglect Shadow Embrace! That debuff takes a long time to build back up to full strength, and is all too often overlooked. The exception to this rule is Bane of Agony, which you should allow to take full damage ticks if you can. Use Fel Flame to add duration Unstable Affliction if you are pressed for time.
Demonology has two valuable traits that make it fairly powerful for this fight: it has absurd burst AoE, and it has an execute ability that does not require a long time to ramp up. You won't have the dual-target capability as Affliction, but you are more valuable to your raid in other places anyway.
- Kill the Whelps. If the Whelps are up, pop Meta, and jump in and blow everything you have. Between Immolation Aura, Shadowflame, Felstorm, and Hellfire, the whelps are going to die faster than you've ever seen them die before. Be careful about aggro (warn your raid what you are about to do!) and be ready to teleport out if you start taking too many hits. You can also use Hand of Gul'dan to hold the mobs in place, but usually your tank will have them well in hand and you won't need to waste your time.
- Exploit Decimation. Any time something is getting close to dying, use it to proc Decimation, and blow your Soul Fires on Halfus since he takes so much more damage. If you can find a lingering whelp to use, great, otherwise the second drake will do just fine. As soon as he hits execute range, switch to Halfus, and keep the buff going as long as you possibly can.
Destruction has exactly one thing going for it in this fight: Bane of Havoc. The spec has terrible AoE and the DoTs aren't as powerful as Affliction, so this effortless extra damage is really all you've got. Destruction does have some fairly nice burst which will help to get the drakes out of your hair more quickly, and it isn't as inconvenienced by DoTs falling off during Furious Roar as say, Affliction would be; but really, Destro is only good for this fight because it has such great overall damage.
- Bane of Havoc goes on Halfus, especially before the first drake dies. If your raid gets to the point where they decide they don't need as much damage on the drakes, you can feel free to put your Bane on the second drake and benefit from the extra damage to Halfus, but this probably won't be the case for several months, as your healers will generally need the dragons to die as quickly as possible. Whichever you target, however, make sure you put Curse of Elements on both targets, as Bane of Havoc will double dip from the increased spell damage. WoW reads "Bane of Havoc" as one lump of damage, just like any other DoT, and it will apply the appropriate damage modifier to that spell. It doesn't read it as "15% of Immolate + 8% Curse of Elements" it understands it as "Here is some spell damage, it's going to hit 8% harder because Curse of Elements is up!"
- Tab target Immolate on the whelps. Rain of Fire really sucks. It sucks a lot, and it absolutely destroys your mana when the drakes run around, leading you to spend too much time Life Tapping. The drakes are going to be alive long enough that you may as well let them take the full DoT duration from Immolate, and the damage will give Bane of Havoc quite a bite. Don't be scared to throw a Shadowfury to help out too.
- Use Demon Soul: Imp on Halfus. As of 4.06, this ability increases your crit chance, and you should put those critical strikes where they do extra damage.
These dragons are probably the only dragons I actually like fighting, for two very simple reasons: they don't have a tail swipe, and they don't cleave me. In this kind of fight, where you are running back and forth like a rubber band half the time, it's a relief not to have to worry about getting knocked down by an over-sized lizard feeling feisty. This fight was also made for warlocks: two targets (one of whom is only in range of casters), mechanics that force you to group up and then spread out very quickly, and, well, shadow and fire damage galore. Need I say more? Oh right, that's why you're here.

General:
- Put your DoTs on both targets.
- Use your Teleporter to GTFO. In Phase 1, you will want to use Teleport to help you deal with Blackout. You have two choices: you can either put your portal on Valiona's tail, to jump in and share the damage and then immediately run back to your place, or you can put your portal away from the group, run in to share Blackout damage, and then portal to get out immediately afterwords and avoid Twilight Blast. While it is important to avoid hitting your raid with Twilight Blast, I personally prefer to keep my portal on the boss for this reason: you can use it to get close to and then run through the boss when Valiona casts Twilight Flames. Using your portal this way means that no matter which direction Valiona faces -- even directly towards you-- you can get out of the line of fire without breaking a sweat.
- In Phase 2, when Theralion is on the ground, you won't be able to use your portal in the same way for the Twilight Meteor Valiona throws at you, because Theralion will be moving around to avoid Fabulous Flames. What you can do is use your portal to get out of Deep Breath. Deep Breath will be applied to one third of the room, and you have no way of predicting where it will fall, so the portal is not a guarantee of safety. If you place your portal in the middle of the room, you are most likely to be in range of it, and you have the shortest possible travel time to either side of the room should the fire be headed down the center. You are going to have to be aware of whether or not Theralion dropped Fabulous Flames on your portal when you weren't looking, and pay attention to whoever in your raid is watching Valiona.
- Use your cooldowns -- such as Demon Soul -- when Valiona is on the ground. You are much more likely to be stationary during Valiona's ground phases, so you will get more benefit out of the time they are available to you. You may choose to save them for extra damage in Phase 2, if you are lucky enough to be targeted with Engulfing Magic, however since this is not a guarantee you must use them as you think best.
Playing Affliction on this fight can yield amazing results, but it is tricky to execute well. The potential for Affliction here comes from Glyph of Soul Swap, which will allow you to keep almost a full set of DoTs rolling on both dragons simultaneously. With everything else going on, however, it can be very difficult to keep track of what is going on and will take some practice to perfect the technique.
- Set a focus target. If you are quick, you can change your focus target between the two dragons depending on which boss is in the air. Macros are your friend here. What you want to do is treat the dragon on the ground as your primary target, since that is where the rest of your raid will be using their complimentary debuffs. Use Haunt on this dragon, Soul Swap to copy those DoTs to the second dragon, and then cast Shadow Bolt to stack Shadow Embrace. The better you keep track of the DoTs on your secondary target, the easier it will be to keep Shadow Embrace at max stacks. I use shift-modifying macros-- holding down shift automatically casts my spell on my focus target instead of my current target. Mouseover macros can also work. It also helps to keep track of the cooldown on Soul Swap -- I use Power Auras to let me know when it is available. Executing this strategy well can take some practice, I recommend spending time on a couple target dummies if you are going to attempt it.
- Be very, very aware of Engulfing Magic. You are rolling double DoTs, and if you get this debuff in the raid you are going to blow up like a shiny purple mud pie. Hopefully your raid will be using the strategy that positions casters and healers ten yards away from each other. The upside of Engulfing Magic in this situation is that your damage is going to go up exponentially. If you can, get your mage or shaman to lust at this point, and refresh both sets of DoTs just before the buff expires.
There isn't much benefit to playing Demonology on this fight, truth be told. The 10% spell damage is always nice, but in most cases it's not worth the 4% over a mage or shaman, nevermind an elemental shaman.
- Save Metamorphosis for when (if) you are targeted with Engulfing Magic. There is no guarantee you will get this buff, but if you do, you will be happy to have a cooldown up. Use Meta early in Phase 1 so that it will be up again in Phase 2.
You get the easiest job here. Destruction has great damage and effortless "splash" damage.
- Bane &CoE the dragon in the air. Don't neglect to throw your Immolate and Corruption up here too.
- Use your Soulburn: Soulfire during Theralion's ground phase, rather than on Valiona. There is a lot of movement in this phase, and this is a great time to save yourself from getting interrupted when hardcasting Soulfire to keep your buff up.
This fight is going to be hit or miss for warlocks. Normally we make fights with two primary targets our bitch, but this particular council is made trickier due to the need to balance damage equally, and your raid may not appreciate you tipping the scales too far in either direction.
What can be great about this fight for warlocks is the execute phase -- you will need to decide whether your raid needs your damage high throughout, or if you should re-spec to be burst-y when it counts.
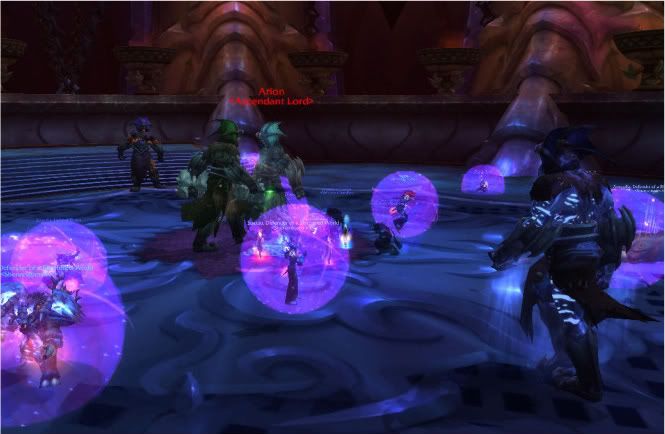
General:
- Switch to Ignacious's a few seconds before his Aegis of Flame to give yourself time to build up your DoTs and break his shield as fast as possible.
- Keep your portal in the middle of the room in Phase 2. This will mean that you can quickly jump to whatever buff you need to pick up next. You can also use it to avoid fall damage in Phase 3, should you be picked up by the Elementium Monstrosity.
- When you are marked as the Lightning Rod, don't chase your assigned target, but DoT up whatever is in range (assuming you aren't supposed to be holding back DPS on that target).
- While this is not warlock specific, be aware that the Elementium Monstrosity comes out of phase very quickly, make sure you are quick on the trigger with Curse of Elements, and find yourself a good place to stand that will require minimal movement to stay in range of the boss.
Affliction is fairly well suited for this fight. Your dual-target capability means that you can help balance damage between the two bosses if you need to, but you also have moderately strong single target damage, and excellent survivability in Phase 3. Execute abilities (like Drain Soul) are also quite valuable on this fight, especially as your group is still learning. Phase 3 can be brutal on your healers.
- You can continue to use Soul Swap on the two mini bosses on this fight, but this is really going to depend on your particular group. The goal is to balance DPS exactly between the two bosses, and you can upset that balance if your raid is not aware that you plan on doing this. Hell, even if they know ahead of time, there is enough flux from week to week based on who got more upgrades, and one group might end up outperforming the other unexpectedly. This is okay, to an extent -- you are expected to monitor the health percentage of both bosses and adjust accordingly, so just remember that you are carrying heavy bricks.
- Save your Soulburns for Phase 2, when you are running around and can better appreciate instant damage. You won't want to use even an instant cast Soul Fire in Phase 3, as you'll want to be using Drail Soul.
- If you are using the Succubus, use Demon Soul as early and often as possible for more Shadow Bolt damage. If you are using either the Succubus or the Imp, Soulburn and summon yourself a Fel Puppy in Phase 3, as the buff to your shadow DoTs will help you get through the burn phase.
Demonology doesn't get to have a lot of playtime on this fight, but it nonetheless remains extremely viable. High DPS is not important in Phases 1 and 2, what matters is keeping the two bosses' health in line. Phase 3 however, is an all out burn phase. Not only does Demonology have an absurd execute ability, if your group doesn't already have a 10% spellpower buff, this is one place where it can make a big difference.
- This should go without saying, but save a Metamorphosis for the burn phase. If you have enough ranged to avoid chain lightning in melee range, go ahead leap into melee for Shadowflame and Immolation Aura.
Destruction doesn't have the highest execute phase damage, so if your group is having difficulty killing the boss in Phase 3 before your healers hit a wall, you should offer to respec. In most cases though, Destruction is great to play on this fight because it is easy to control your DoTs when you need to hold back on a target, and you can maintain your rotation even when running around looking for tornados to bang into.
- Bane of Havoc can be a perfect modifier for you to leave on your secondary target to balance out a group that is always just a bit behind. If it turns out to be too much, Bane of Havoc your primary target and then override it with Bane of Doom. There is also an uncofirmed bug that you can leave Bane on Feludius or Ignacious and they will continue to take damage in Phase 2, which will lower the health of the Elementium Monstrosity just a little bit more.
- Save at least one (probably two) of your Soulburns for Phase 3, so that you don't have to hardcast Soulfire when Bloodlust is up.
- Pop your Nether Ward to mitigate damage from Fire Seeds and Chain Lightning.
Oh man do I love this fight. What spec you choose to play will depend entirely on the needs of your group, as each and every one brings awesome utility.
A note about Corrupted Blood: at 100% Corruption, all of your damaging spells will be instant casts. This can be enormously powerful for all damage dealers, particularly Destruction, where your fire mastery and access to instant nuke Soul Fire make for a lethal combination. The catch of course is that you are unable to be healed, and generally when that happens, you die. I have yet to come across many groups who would advocate gaining 100% Corruption, as it is much safer to simply carry on as normal. I'm sure going to have fun trying to convince my raid leader to let me give it a shot though!
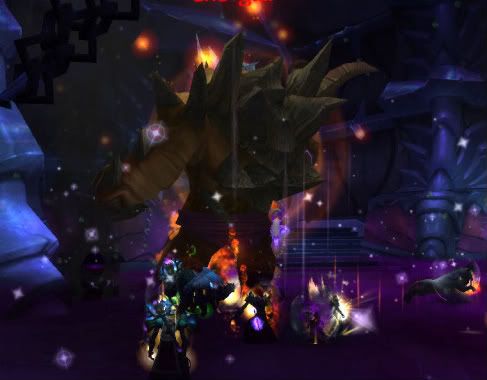
General:
- Keep your Fear/Death Coil/Howl of Terror button handy. Casting Fear on a Conversion target will keep them from casting Twisted Devotion, but since they cast this very quickly, your longer cast time is less than ideal. You may still need to use it however if someone near you gets targeted say, while you are killing adds in a different area of the room than the boss.
- Keep your Portal on Cho'Gall's butt. You can get away from Blood of the Old God more quickly.
- Unless you are lucky enough to have a Boomkin in the raid, you will probably need to CoE the Adherent. Other classes who provide the +8% spell damage (Rogues, DKs) likely won't be switching to the add.
Affliction:
This is your all-around solid spec, but it's not terrific. As of 4.06, you won't see as much damage coming from Affliction, but that can be okay depending on your group composition. Cho'Gall needs lots of AoE with very short intervals, and he needs big numbers in Phase 3. Affliction will be a little weak on the adds in Phase 3, so make sure your raid can handle them without much support from you.
- Once again, you are going to want to make sure you pick up Jinx and Soulburn: Seed of Corruption. The blood that spawns throughout this fight is going to require frequent bursts of AoE, which Affliction can do very respectable damage with. It's not as great as Demonology, but Demonology's AoE is on a minute and a half cooldown, and you need to deal with the blood more frequently than that. If your raid has low AoE damage, and it is depending on you to kill the blood each and every time, you will need to have good AoE damage without Metamorphosis. What is great about this fight for Affliction is that you can Drain Soul an add to get your Soul Shards back, so you will always have a Soulburn: SoC available.
- In Phase 3, use Soul Swap on one of the Darkened Creations, and then put Corruption and UA on the other three before swapping back to the boss. You can help to DPS them down if your raid is really struggling, but in this case you will probably want to re-spec anyway. The adds need to die more quickly than the time it would take for you to have much effect on them.
Any fight with adds is going to inflate the numbers for Demonology, and Cho'Gall is no exception.
- Your Metamorphosis will be most effective on the last add phase before the transition. For most groups, this will be the fourth add phase, which will be about four minutes into the fight. This means that you can probably get two Meta's off before the one that really counts. You must be extremely careful -- if the adds hit you, you will gain stacks of Corrupted Blood, and you will die far too early Phase 3. Be extra aware of Corruption Crashes during add phases, so you at least have a little leeway with your corruption level.
- Use Hand of Gul'Dan on one of the bloods towards the front of the pack, for maximum effect on it's second stun.
- And of course..don't forget about Decimation! Proc it off the Blood of the Old Gods and use early Soulfires on Cho'Gall. During Phase 3, keep the buff rolling by proccing it off the boss himself, and using the damage to burn the adds faster.
- Your Felguard's Axe Toss can interrupt a Converted target!
- Shadowfury has multiple uses during this fight. Your AoE on the adds isn't great, but Shadowfury helps control them which leads to more effective damage from...other people. Shadowfury can also interrupt one of the Converted. Too bad the cooldown is so long, you'll likely only get one Shadowfury per add phase, so spend it wisely.
- Keep your Bane of Havoc on a convenient keybind, as you'll use it frequently. Pop it on Cho'Gall when the Corrupted Adherent Spawns, and switch back after the blood is dead. You'll also put it on Cho'Gall to help DPS the Darkened Creations in Phase 3, which you should be extra aware of since your damage will be crucial.
- Use Soulburn: Soulfire on Corrupted Adherents for maximum efficiency when killing them, and Shadowburn to get shards back.
"Don't get any ideas."
I am limited in my attempts to be awesome.


